

How to Package Freeze-Dried Food for Long-Term Storage
Freeze drying doesn't end when the cycle is complete. Proper packaging helps protect your food from moisture, oxygen, light, and environmental conditions that can affect quality over time.
Good packaging preserves the work you've already invested in preparing and freeze drying your food. Choosing appropriate packaging, labeling it clearly, and storing it in the right environment all help maintain quality until you're ready to enjoy it.
This guide explains the basic principles of packaging freeze-dried food and offers practical tips to help you build good storage habits.

Quick Answer
To package freeze-dried food for long-term storage:
-
Verify the food has finished drying.
-
Package it promptly to reduce exposure to air and humidity.
-
Choose packaging that fits your storage goals.
-
Label each package clearly.
-
Store packaged food in a cool, dry location.
Each of these steps helps protect food after the freeze drying process is complete.
Imagine spending hours preparing food, carefully freeze drying it, and then leaving it uncovered on the kitchen counter.
It wouldn't take long for the surrounding environment to begin affecting its quality.
Freeze-dried food readily absorbs moisture from the surrounding air, making proper packaging one of the most important parts of successful long-term storage.
Step 1: Make Sure the Food Is Ready
Before packaging, make sure the freeze-drying cycle has finished and the food is ready for storage.
Different foods may require different drying times, so avoid rushing the process.
Packaging food before it's completely dry can affect long-term storage quality.
If you're unsure, consult your Harvest Right guidance for evaluating dryness before packaging.
Harvest Right Tip
Develop a simple routine after every batch. Verify the food is ready, gather your packaging supplies before opening the machine, and package food soon after the cycle is complete.
Step 2: Package Food Promptly
Freeze-dried food naturally begins interacting with the surrounding air once it's removed from the machine.
The longer food sits exposed, the greater the opportunity for moisture and humidity to affect it.
Having your supplies ready before unloading the trays makes the process faster and helps minimize unnecessary exposure.
Avoid leaving trays uncovered any longer than necessary while preparing your packaging materials.
Harvest Right Tip
Gather your bags, jars, labels, oxygen absorbers, and sealing equipment before opening the freeze dryer. Having everything ready helps reduce the amount of time food is exposed to air.
Step 3: Choose Packaging That Fits Your Needs
There isn't one perfect storage solution for every situation.
The best choice depends on how you plan to use the food.
Some people package:
-
Individual servings
-
Family-size meals
-
Recipe ingredients
-
Emergency food supplies
-
Camping meals
-
Pantry staples
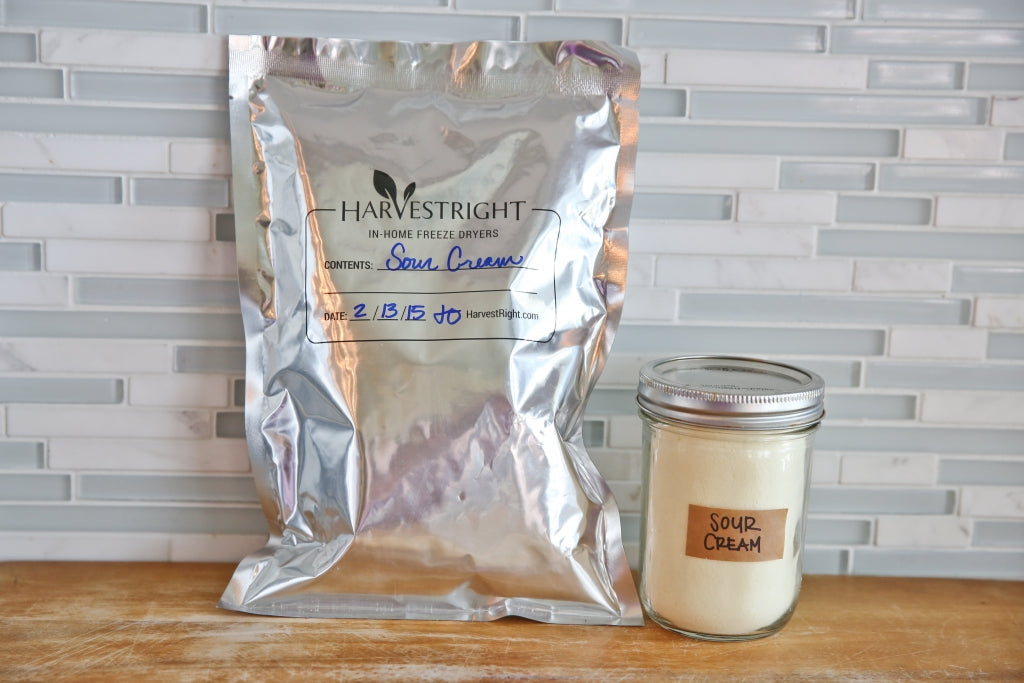
Mylar bags, mason jars, vacuum-sealed containers, and other packaging methods all have advantages depending on your storage goals. If you're using Mylar bags, choose a good-quality bag designed for long-term food storage. We'll explore these packaging options, along with their advantages and best uses, in dedicated guides.
The right package is the one that matches how you'll actually use the food.
Harvest Right Tip
If you're using oxygen absorbers, have your bags ready before opening the package. Once opened, oxygen absorbers begin working immediately. Reseal any unused absorbers as quickly as possible in an airtight container or bag to help preserve their effectiveness for future use.

Step 4: Label Every Package
It can be surprisingly difficult to remember what's inside a package several months later.
Clear labels help keep your pantry organized.
Consider including:
-
Food name
-
Packaging date
-
Portion size
-
Preparation notes (if helpful)
-
Batch number (optional)
A few seconds spent labeling can save considerable confusion later.
Harvest Right Tip
Create a consistent labeling system for every batch. Whether you use handwritten labels or printed ones, consistency makes your storage shelves easier to organize and simplifies meal planning.
Step 5: Store Food in the Right Environment
Where you store food matters just as much as how you package it.
In general, look for a storage location that is:
-
Cool
-
Dry
-
Clean
-
Protected from direct sunlight
-
Organized and easy to access
Avoid areas where temperature or humidity changes frequently, such as garages, sheds, or damp basements.
A well-organized pantry also makes it easier to rotate food and quickly find what you need.
Harvest Right Tip
If you're storing food in Mylar bags, consider organizing the sealed bags in sturdy totes or storage bins. They help keep your storage area organized while providing an additional layer of protection from pests, accidental punctures, and general wear during storage. As an added benefit, totes make it easier to move or transport your food if needed.
Organize Your Pantry for Success
As your collection grows, organization becomes increasingly valuable.
Many people organize by:
-
Food category
-
Meal type
-
Date packaged
-
Family favorites
-
Emergency supplies
Consider storing foods you use regularly separately from long-term emergency supplies.
Whatever system you choose, consistency makes your pantry easier to manage.

Think Beyond Storage
Packaging isn't only about preservation.
It's also about convenience.
Imagine opening your pantry and finding:
-
A complete taco dinner
-
A ready-to-blend smoothie kit
-
Soup ingredients already portioned
-
Individual fruit snack packs
-
Camping meals packed by day
Thoughtful packaging can make everyday cooking just as convenient as long-term storage.
Good packaging isn't just about preserving food—it's about making that food easier to enjoy later.
Bottom Line
Packaging is one of the most important steps in successful food preservation.
Prompt packaging, clear labeling, thoughtful organization, and appropriate storage conditions all help protect the quality of freeze-dried food after the drying cycle is complete.
Building good packaging habits today can make future meals easier, more organized, and more enjoyable.
Key Takeaways
-
Packaging is part of the preservation process—not an afterthought.
-
Verify food is completely dry before packaging.
-
Package food soon after freeze drying.
-
Choose packaging based on how you'll use the food.
-
Label every package clearly.
-
Store food in a cool, dry, organized location.
Frequently Asked Questions
Why should I package food soon after freeze drying?
Packaging promptly helps reduce the amount of time food is exposed to humidity and surrounding air.
What information should I put on the label?
Many people include the food name, packaging date, and portion size. Some also add preparation notes or batch information.
Should I package meals or ingredients?
Both approaches can work well. Consider how you'll use the food later and package it accordingly.
Does pantry organization matter?
Yes. A consistent organization system makes it easier to locate food, rotate inventory, and plan meals.
Why is storage location important?
Environmental conditions such as heat, moisture, and light can influence food quality over time. Choosing an appropriate storage area helps protect your preserved food.
Can I package everything the same way?
Not necessarily. Different foods and different storage goals may call for different packaging approaches. Choose methods that best match how you'll use the food.
Protect Your Hard Work
Every batch of freeze-dried food represents an investment of time, ingredients, and effort. Proper packaging ensures that investment pays off for years to come.
By choosing the right packaging materials, using oxygen absorbers, sealing food carefully, and storing it in the right environment, you can preserve the quality of your fruits, vegetables, complete meals, and favorite recipes for the long term.
Whether you're preparing for emergencies, preserving a garden harvest, or simply making everyday meal planning easier, thoughtful packaging is the final step that helps keep your food fresh and ready whenever you need it.
Share:
Freeze-Drying and Rehydrating a Full Pasta Dinner
25 Unique Foods You Can Freeze Dry